Setting up your Odroid-C4 hardware #
The example system targets the HardKernel Odroid-C4 platform as it is a fairly inexpensive, accessible, and reliable ARM single-board-computer.
The Odroid-C4 is available for purchase directly from HardKernel.
Official documentation for the Odroid-C4 is available here.
What you will need #
Required #
| Hardware | Link |
|---|---|
| HardKernel Odroid-C4 SBC | https://www.hardkernel.com/shop/odroid-c4/ |
| Power Supply | 12V 2A |
| 3.3V TTL-level UART to USB converter | https://www.hardkernel.com/shop/usb-uart-2-module-kit-copy/ |
| SD card or eMMC | https://www.hardkernel.com/shop/16gb-emmc-module-c4-linux/ |
Optional #
| Hardware | Link |
|---|---|
| PN532 NFC card reader | https://www.fruugoaustralia.com/pn532-nfc-rfid-v3-module-near-field-communication-support-and-android-phone-communication/p-228968185-488544821 |
| VU7C touchscreen display | https://www.hardkernel.com/shop/odroid-vu7c-7inch-1024x600-hdmi-display-with-multi-touch/ |
| Ethernet cable |
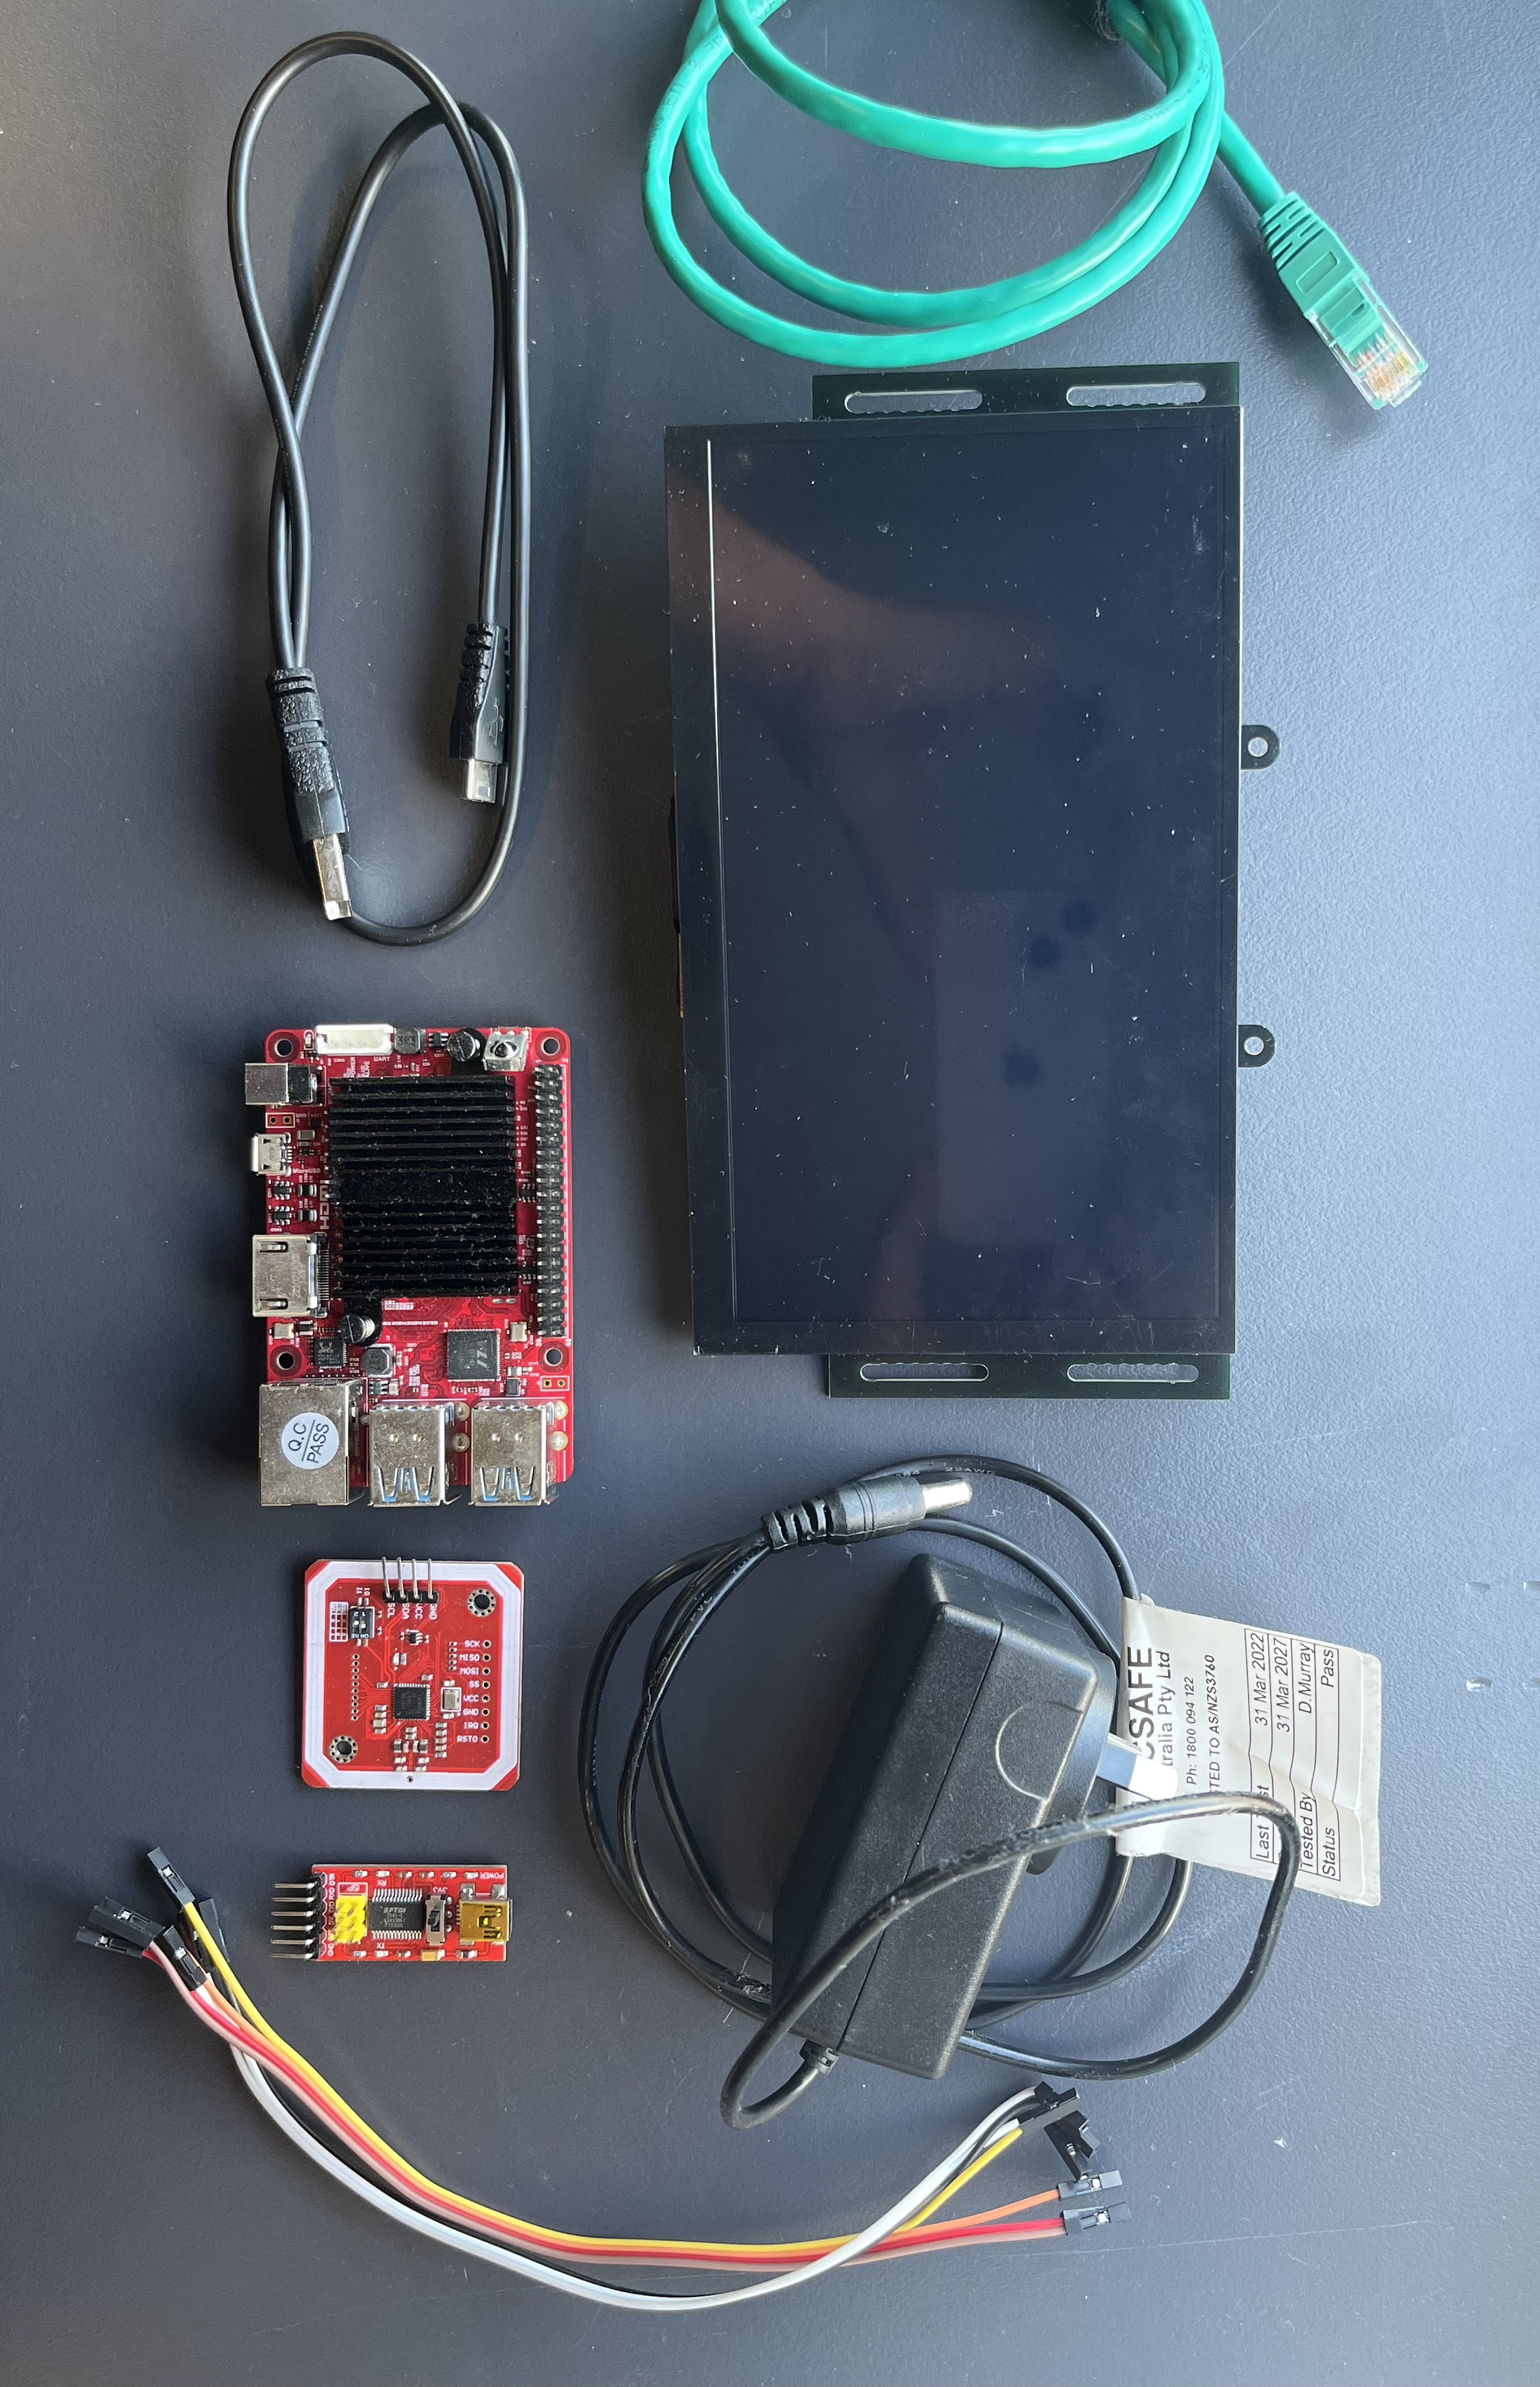
Connecting everything together #
This section will show you how to connect all the hardware pieces you have to your Odroid-C4.
UART #
There multiple ways to connect to the UART but in this section we will describe a common and easy way which is to use a UART to USB adapter like below:
The connection will look like this:
Your PC <-> USB <-> UART adapter <-> Odroid-C4
You will connect the UART adapter to your computer via USB.
You will then need a program to read the serial connection on your computer such as minicom, picocom or a GUI application such as GTKTerm.
For example, to use minicom:
# Note that the path to the USB device of the UART adapter
# may be different for you
minicom -D /dev/ttyUSB0 -b 115200
Display #
The display is fairly easy to connect, at the back you will see a bunch of GPIO inserts which you want to align with the GPIO pins on the Odroid-C4.
You will then want to connect the HDMI bridge, the HDMI port on the display should line up with the HDMI port on the Odroid-C4.
NFC card reader #
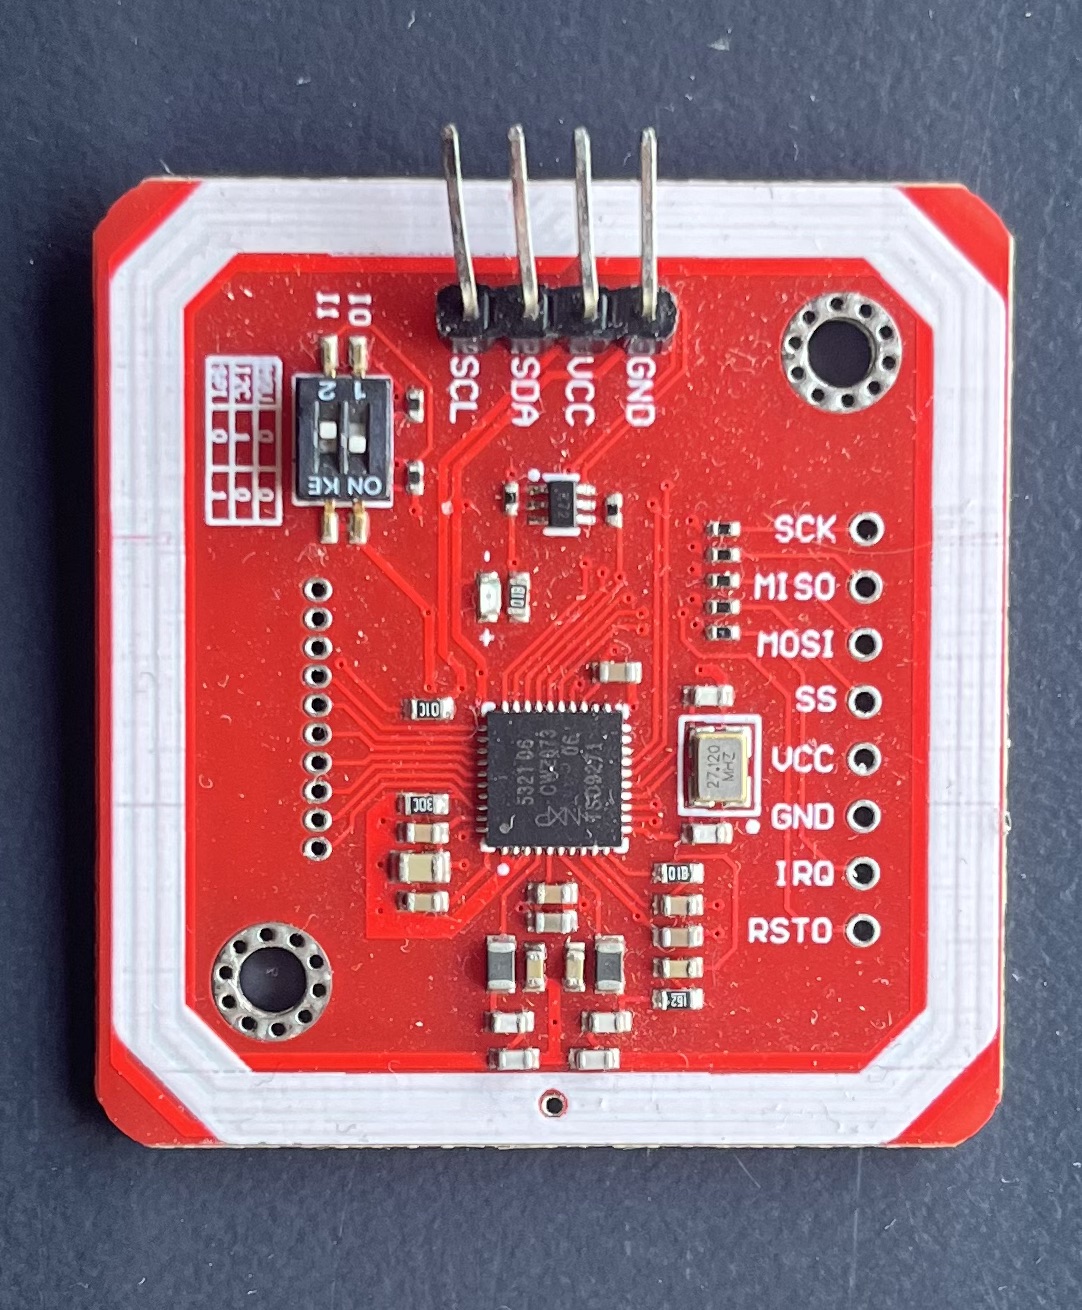
There are two parts to setting up the card reader:
- Setting to I2C mode.
- Connecting the GND, VCC, SDA, and SCL pins.
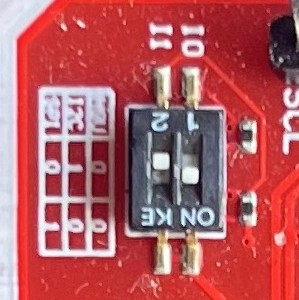
Setting to I2C mode #
We need the NFC card reader to be in I2C mode, which means that the DiP need to be in a certain configuration. For I2C, switch 1 needs to be set and switch 2 needs to be not set. The image below can be used as reference.
Connecting the pins #
With display #
Below is a close-up of the back of the right side of the VU7C display. Highlighted in green are the relevant pins that we need to connect to the NFC reader:
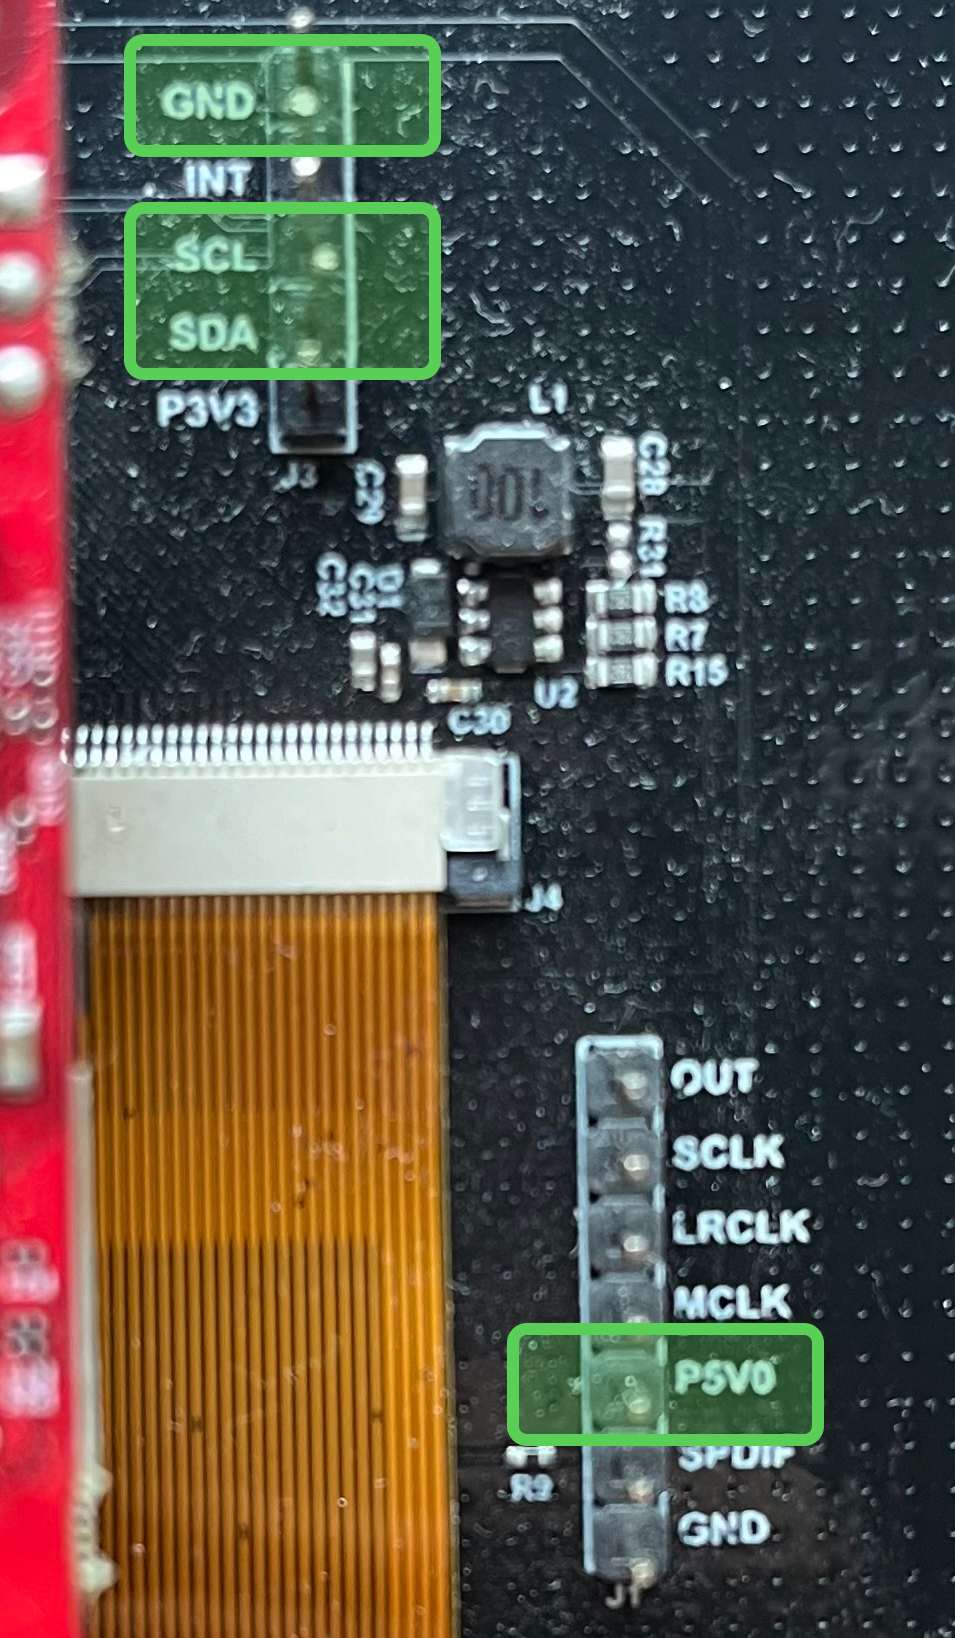
| Display pin | NFC card reader pin |
|---|---|
| GND | GND |
| P5V0 | VCC |
| SCL | SCL |
| SDA | SDA |
Without display #

| GPIO pin | NFC card reader pin |
|---|---|
| 3 (bottom-left) | SDA |
| 4 (top-left) | VCC |
| 5 (bottom-right) | SCL |
| 6 (top-right) | GND |
Ethernet #
If you want to use the NFS client, you will need to give the Odroid-C4 access to your NFS server via ethernet.
Flashing U-Boot #
Follow the instructions here.
Configuring U-Boot #
When you see this message from U-Boot:
Hit any key to stop autoboot: 1
You will want to stop the autoboot immediately. From here, we want to setup the U-Boot environment to automatically load the system image. There are two main ways of getting system images into U-Boot:
- (recommended) Booting via the network. Where you have a TFTP server on some other computer that transfers the system image to U-Boot on the Odroid-C4 via the network.
- Using a storage device such as an SD card or eMMC.
Option 1 - Booting via the network #
By default U-Boot is set to auto-boot into a Linux system, we want to change that obviously.
This can be done by changing the value of the U-Boot environment variable bootcmd, the contents
of which is executed automatically when U-Boot starts, unless U-Boot is interrupted.
When you are in the U-Boot console, enter the following commands:
=> setenv bootcmd 'dhcp; tftpboot 0x20000000 <SYSTEM IMAGE PATH>; go 0x20000000'
=> saveenv
You should see the following output:
Saving Environment to MMC... Writing to MMC(0)... OK
Note that the <SYSTEM IMAGE PATH> will be the path to the system image in your TFTP server.
From here, you will need to run saveenv in order to have the change persist across reboots.
Finally you can reboot your Odroid-C4 and after a couple of seconds it should automatically boot into your system image.
Option 2 - Booting from storage #
TODO